Return to Home Return to Overview Mechanical Reference Strategy Guide
Fast Greer Guides
This page contains some simple guides for several roles in the Godspoil Greer encounter. If you want something more in-depth, please read the full Strategy Guide.
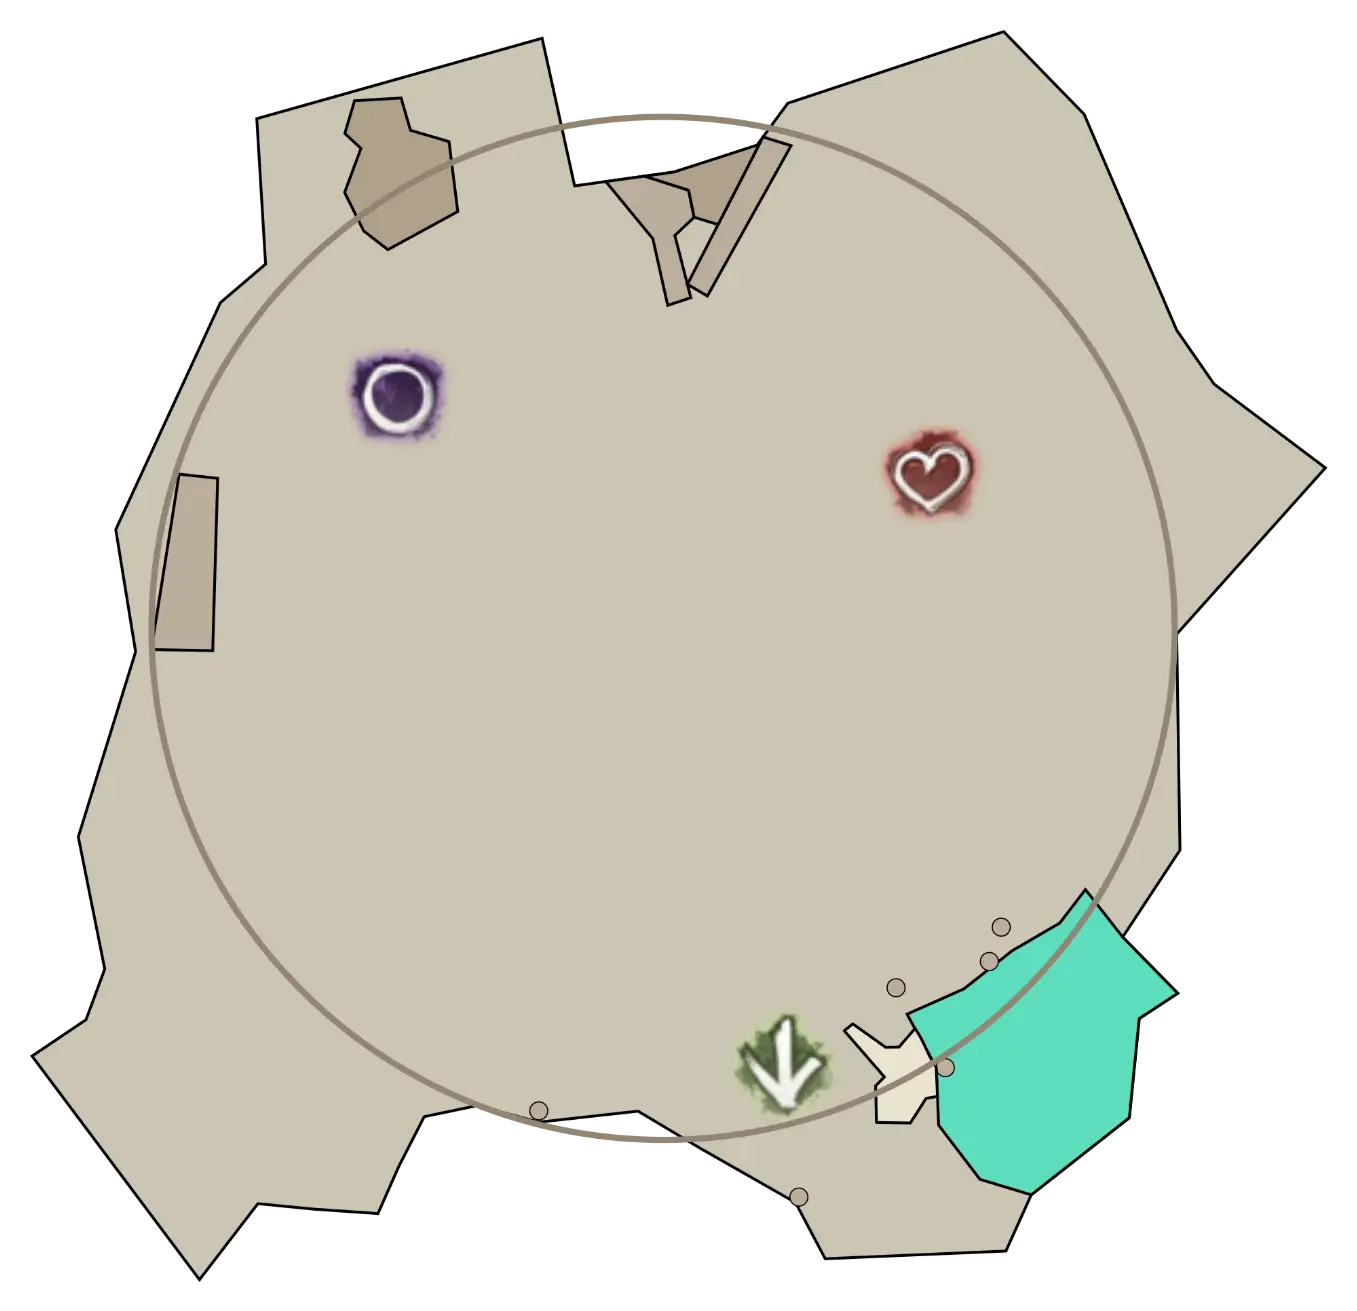
All markers referenced in this guide can be set up with the Commander Markers module for Blish HUD, using the marker pack provided below.
Click to view markers
 Paste the following code into Commander Markers to use this marker pack:
eyJlbmFibGVkIjp0cnVlLCJuYW1lIjoiR3JlZXIgQ00geGIiLCJkZXNjcmlwdGlvbiI6ImRlc2NyaXB0aW9uIiwibWFwSWQiOjE1NjQsInRyaWdnZXIiOnsieCI6MC4wLCJ5IjowLjAsInoiOjAuMH0sIm1hcmtlcnMiOlt7ImkiOjEsImQiOiJtYXJrZXIgbmFtZSIsIngiOjM3My40NDgxODEsInkiOi0yMzIuNTQ3MjExLCJ6Ijo3Ny40MTg1NX0seyJpIjo0LCJkIjpudWxsLCJ4IjozOTEuMDg5NCwieSI6LTIzMi44NzAxNDgsInoiOjc3LjU2MzY0fSx7ImkiOjcsImQiOm51bGwsIngiOjM4MC40NiwieSI6LTI0MC4zODM3NzQsInoiOjc3LjUzOTAyNDR9LHsiaSI6MywiZCI6bnVsbCwieCI6MzU5Ljk5NSwieSI6LTE4Ny42NTAxLCJ6Ijo3Ny4zOTU1MTU0fSx7ImkiOjIsImQiOm51bGwsIngiOjM1Mi4wNDc2NjgsInkiOi0xNTEuMzcxNDQ1LCJ6Ijo3Ny4zOTE3NTQyfSx7ImkiOjgsImQiOm51bGwsIngiOjM4OC4wODYzNjUsInkiOi0yNDMuMDk3NjI2LCJ6Ijo3Ny41NTQwMX0seyJpIjo1LCJkIjpudWxsLCJ4IjozNzMuNzU3MDE5LCJ5IjotMjQyLjU2ODU3MywieiI6NzcuNTc5MjN9XX0=
What are you playing?
Heal Chronomancer Guide
Your responsibilities (excluding basic healing and support as required by your role) consist in:
- Providing
Stability and
Aegis for most, if not all mechanics.
- Intercepting Blighted Orbs using
Distortion to delete them.
- Providing backup projectile reflection with
Feedback.
- Aggro-ing certain adds during the split phases.
- Providing large amounts of CC.
General Information for all Phases
- Save your
Mantra of Concentration for the Swipes. You can often block both swipes with a single cast if well timed. Call out if you don’t have it for mechanics.
- Save your
Singularity Shot for the Slams.
- Save your
Distortion for Blighted Orbs. Sort out with your fellow
Chronomancer who does the first set of orbs and who the second, and call out whenever you are deleting.
Well of Precognition has a long cooldown, so save it for when you need emergency
Stability, or the boss is performing Slams with many stacks of
Empowered.
- When your bubble player calls for backup (usually by saying “Bubble Down”), you should pick a side of the boss (usually by calling “Double”/”Single”) and use your
Feedback to block Empowering Orbs from your direction when you see them.
- If possible, save your
Continuum Split for the CC phases.
- Make sure you are dodging or jumping the shockwave component of Greer’s Slams.
- Sidestep all arrows. Try to provide
Stability for them if you can spare it.
Phase 1
- Start on Reeg.
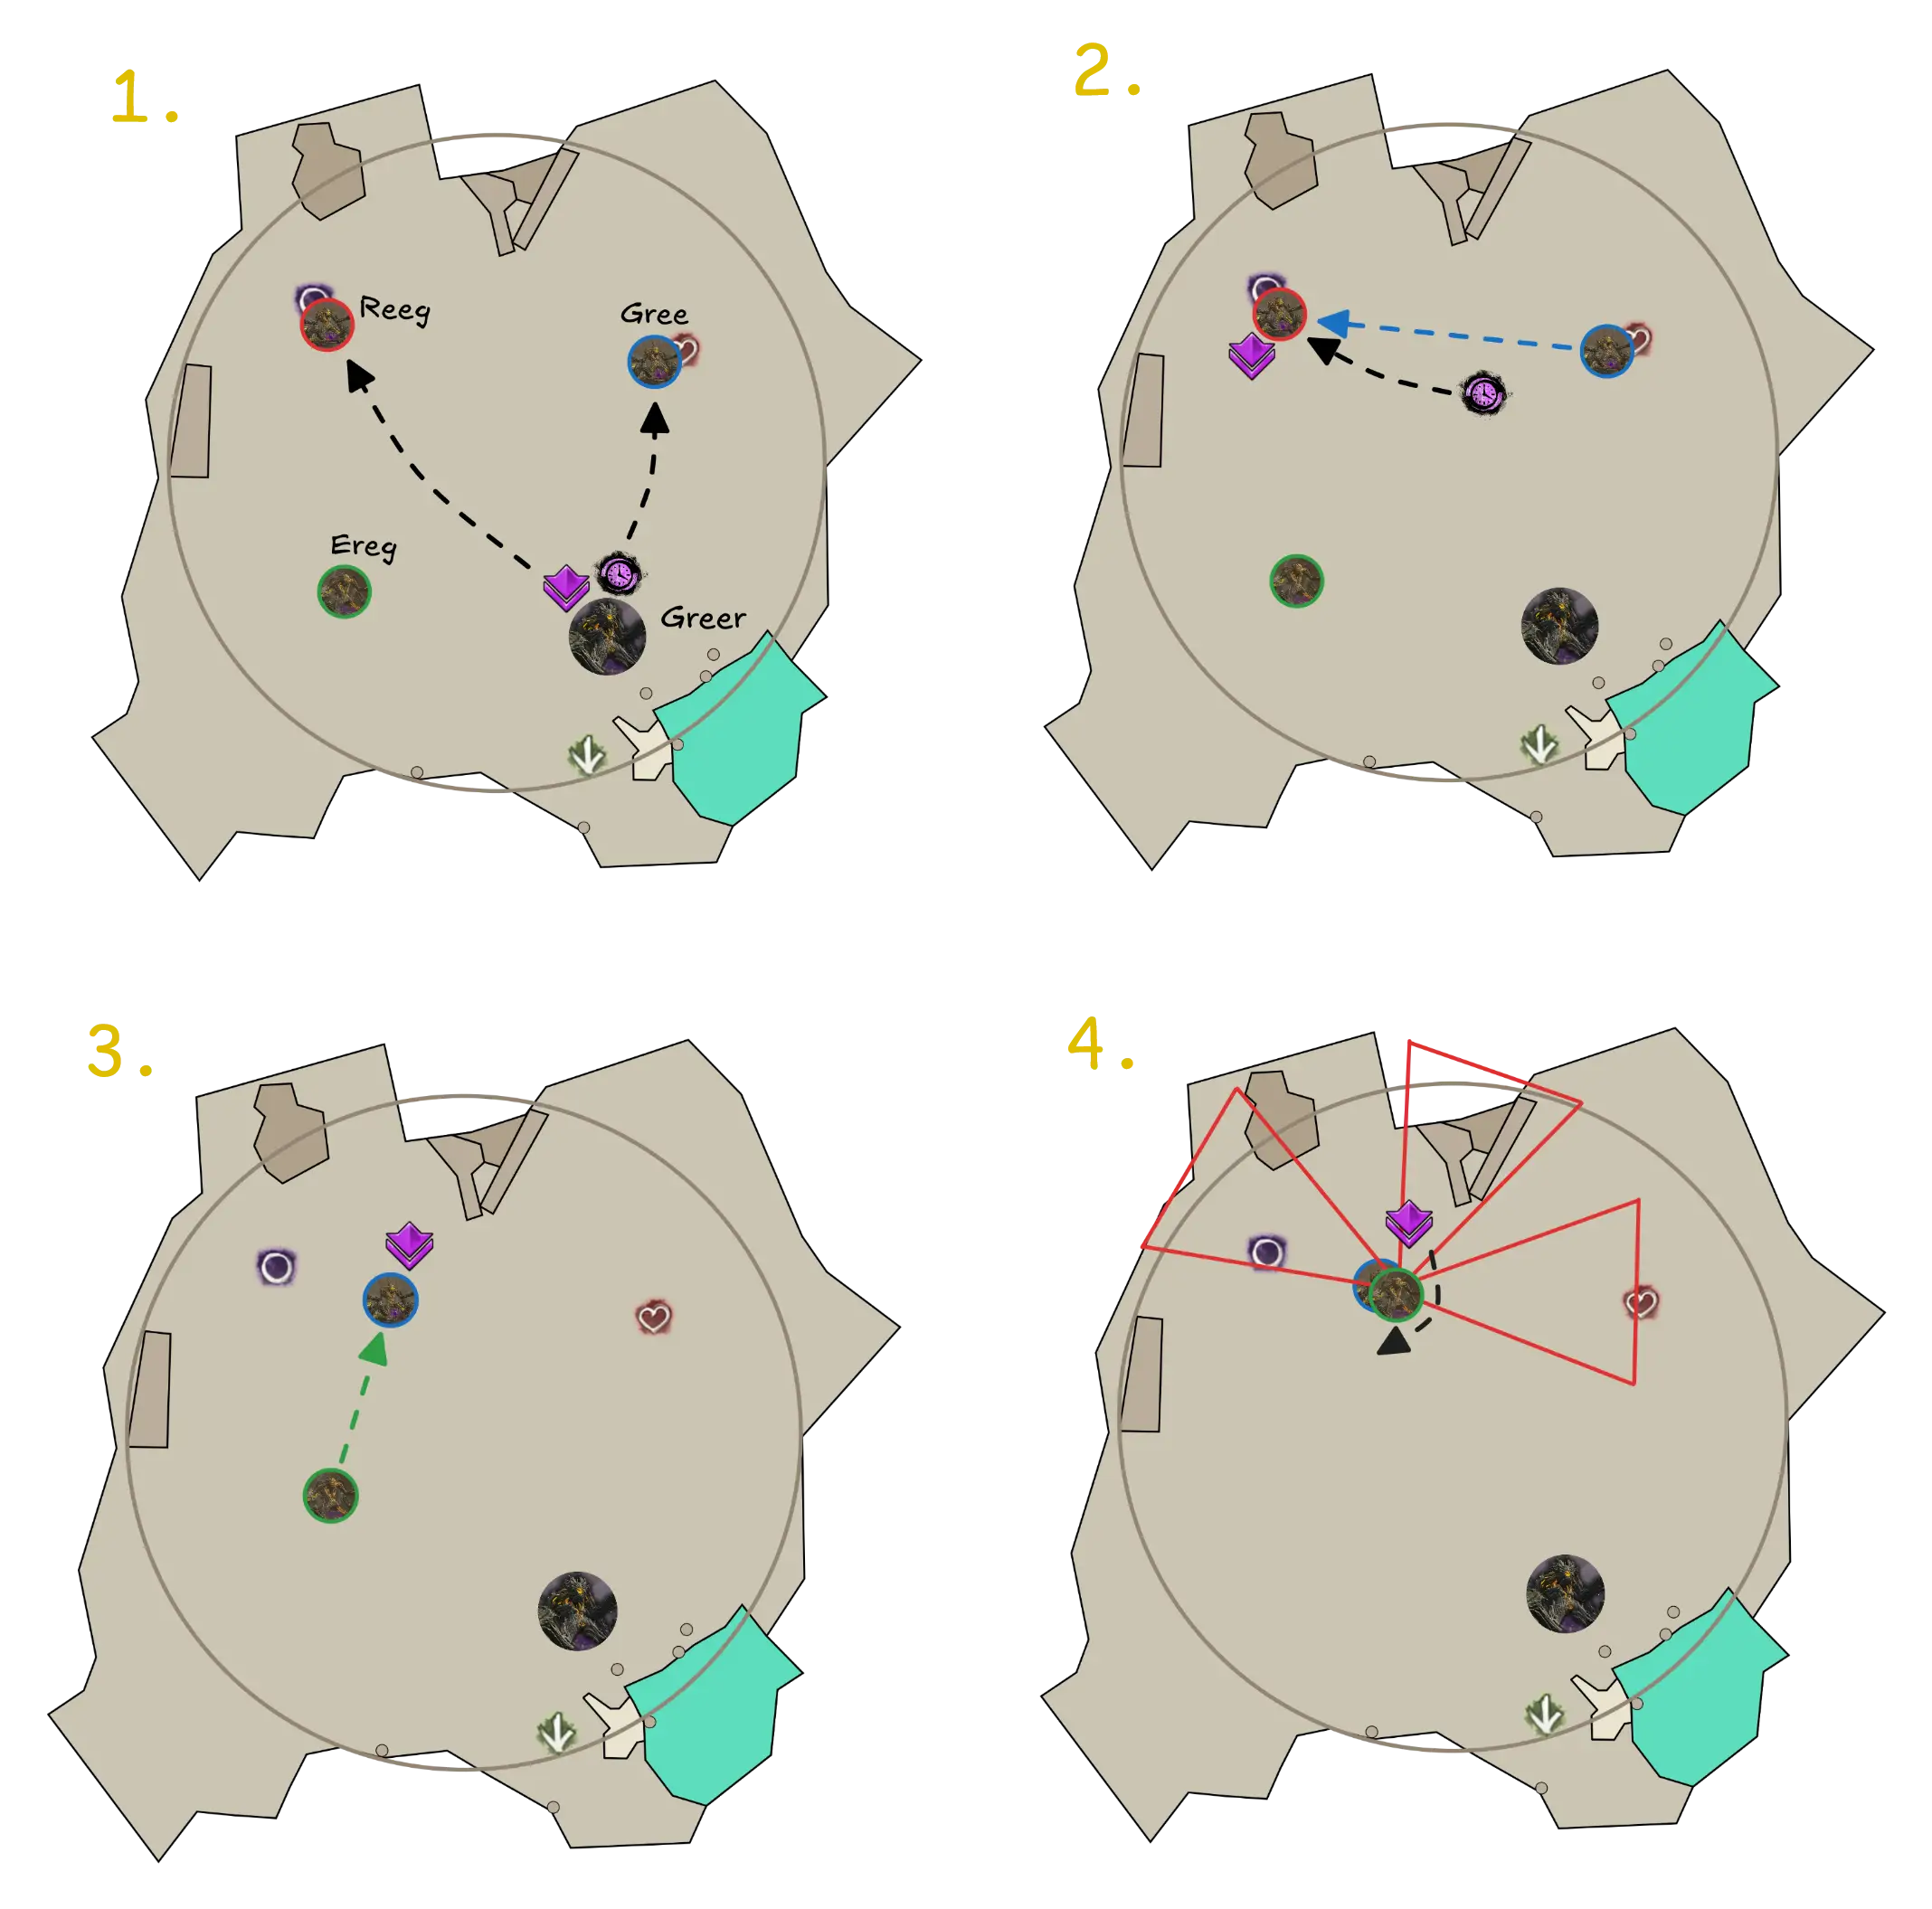
- You will have a first set of Blighted Orbs just before Greens. If you are responsible for this first set, it could be your responsibility to aggro the boss and pull it to the group.
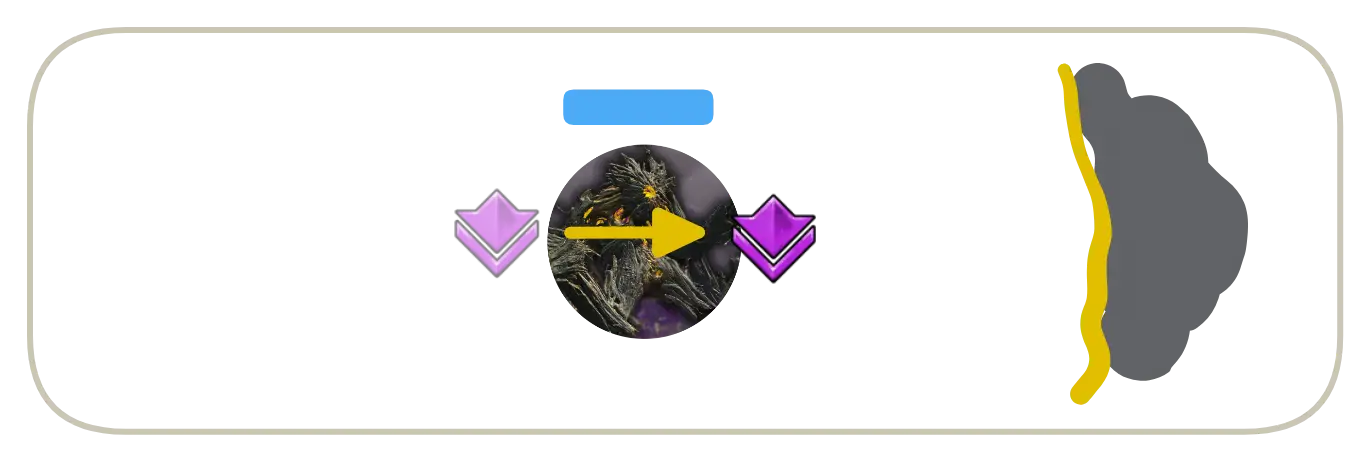
- You may be responsible of blocking the first set of Empowering Orbs from Gree and Ereg. In this case, after deleting the Blighted Orbs, use
Continuum Split to double-cast
Feedback so that both directions are covered.
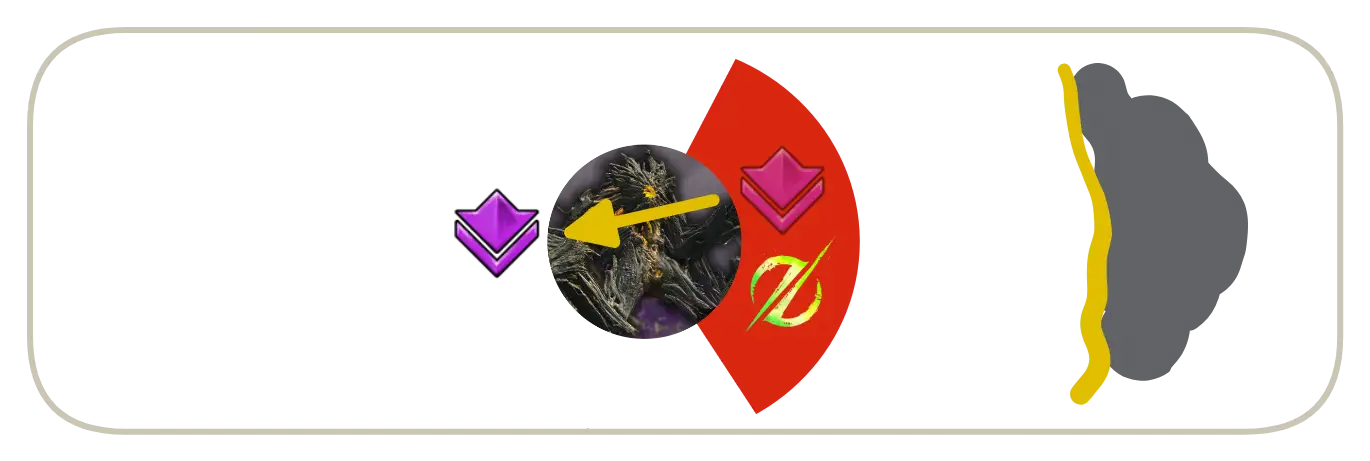
![]() Example of an opener with orb deletion and double
Example of an opener with orb deletion and double ![]() Feedback
Feedback
- When Greer lumbers over, move between him and Reeg so your DPS can cleave them together.
- Wait for Greer’s Breath Attack, baiting it outwards. If Reeg is dead, dodge through Greer and position inwards, otherwise continue cleaving him. You will usually have a second set of Blighted Orbs in this moment.
- Play the rest of the phase positioned towards the center of the arena.
First Split Phase
- Often you or your fellow
Chronomancer must aggro Gree on
and pull it towards the group on
.
- If you are not aggroing Gree, cross the arena to Reeg on
and start damaging him.
- If you get a Green while off-stack, try to dodge it or call for a buddy to help you out.
- Once Reeg is gone or close to 50%, move to Gree. Stack on the outside of Gree so that Ereg walks to you.
- Cleave the two adds together. When Ereg uses its Breath Attack, dodge through it and continue cleaving.
Phase 2
- As soon as Gree is dead, walk back to the boss.
- You may have to delete a set of Blighted Orbs while walking to the boss.
- Move to Reeg and kill him while playing Greens. Players targeted by greens should split to the left and right between the boss and the add, as shown in the image.
- Wait for Greer’s Breath Attack, baiting it outwards. If Reeg is dead, dodge through Greer and position inwards, otherwise continue cleaving him.
- Play the rest of the phase positioned towards the center of the arena.
Second Split Phase
Phase 3
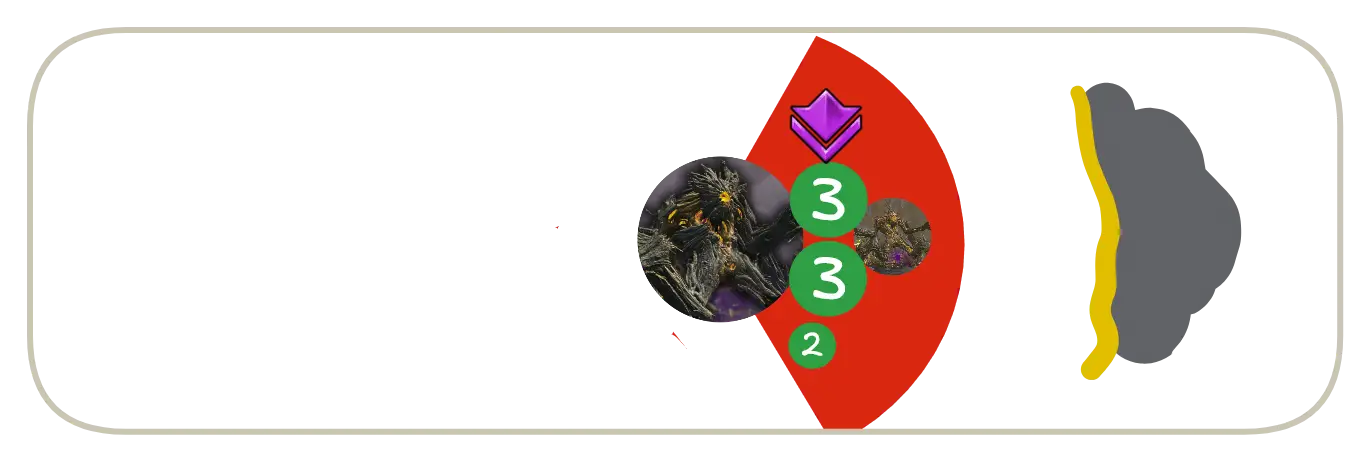
- You will have to play triple Greens. If you get one of these, stack with your green buddies together off the main group, then try to dodge the greens together as shown here. If you go downstate, wait for your teammates to rez you. Use
Feedback to aid with rezzing (thanks to
Medic’s Feedback).
- Play the beginning of the phase positioned towards the center of the arena.
- During CC, your squad should move through Greer towards the outside of the arena.
- On the first Swipe, Slam or Breath Attack after CC, dodge through Greer so that only the tank remains in front of him.
- Play the rest of the phase positioned towards the center of the arena.
Protoling Phase
- Follow your commander to the furthest Protoling.
- Shatter any clones so that Protolings aggro correctly onto you.
- Try to stay on tag while sidestepping Swipes and moving out of Slams.
- You will have to play triple Greens. If you get one of these, stack with your green buddies together off the main group, then try to dodge the greens together as shown here. If you go downstate, wait for your teammates to rez you.
- When the last Protoling is close to dying, your commander will have you move back to Greer.
- Greer will have lots of
Empowered in the final 10%: make sure you are sidestepping Swipes and providing
Aegis for Slams.
Bubble Guide
Your responsibilities (excluding basic damage and support as required by your role) consist in:
- Intercepting Empowering Orbs to prevent the boss from getting
Empowered.
- Negating the many mechanics throughout the fight that barrage players with projectiles.
- Calling for backup every time you do not have projectile reflection or negation for a mechanic.
General Information for all Phases
- Throughout most damage phases, Empowering Orbs will come in sets of three from the two adds (as a “double” and a “single”).
- During CC phases at 80%, 50% and 20%, several Empowering Beasts will spawn. These will often cast Empowering Orbs, so make sure you always have reflection up.
- Always call for backup when your projectile management skills are unavailable, especially during split phases and the Protoling phase.
- Make sure you are dodging or jumping the shockwave component of Greer’s Slams.
- Sidestep all arrows.
Phase 1
- Start on Reeg and DPS him while playing Greens.
- Check if your
Chronomancers are reflecting the first set of Empowering Orbs. If they aren’t, it is your responsibility to run over to Greer, block them and aggro the boss towards the group.
- When Greer lumbers over, move between him and Reeg to cleave them together.
- Wait for Greer’s Breath Attack, baiting it outwards. If Reeg is dead, dodge through Greer and position inwards, otherwise continue cleaving him.
- Play the rest of the phase positioned towards the center of the arena.
- Have your bubble ready for the CC phase at 80%.
First Split Phase
- Cross the arena to Reeg on
and start damaging him.
- Once Reeg disappears or is close to 50%, move to Gree. Stack on the outside of Gree so that Ereg walks to you.
- Cleave the two adds together. When Ereg uses its Breath Attack, dodge through it and continue cleaving.
Phase 2
- As soon as Gree is dead, walk back to the boss.
- Move to Reeg and kill him while playing Greens. Players targeted by greens should split to the left and right between the boss and the add, as shown in the image.
- Wait for Greer’s Breath Attack, baiting it outwards. If Reeg is dead, dodge through Greer and position inwards, otherwise continue cleaving him.
- Play the rest of the phase positioned towards the center of the arena.
- Have your bubble ready for the CC phase at 50%.
Second Split Phase
Phase 3
- You will have to play triple Greens. If you get one of these, stack with your green buddies together off the main group, then try to dodge the greens together as shown here. If you go downstate, wait for your teammates to rez you.
- Play the beginning of the phase positioned towards the center of the arena.
- Have your bubble ready for the CC phase at 20%.
- During CC, your squad should move through Greer towards the outside of the arena.
- On the first Swipe, Slam or Breath Attack after CC, dodge through Greer so that only the tank remains in front of him.
- Play the rest of the phase positioned towards the center of the arena.
Protoling Phase
- Follow your commander to the furthest Protoling.
- Try to stay on tag while sidestepping Swipes and moving out of Slams.
- You will have to play triple Greens. If you get one of these, stack with your green buddies together off the main group, then try to dodge the greens together as shown here. If you go downstate, wait for your teammates to rez you.
- When the last Protoling is close to dying, your commander will have you move back to Greer. Prestack conditions on Greer to improve your ramp-up.
- Greer will have lots of
Empowered in the final 10%: make sure you are sidestepping Swipes.
10% Tank Guide
Your responsibilities (excluding basic damage and support as required by your role) consist in:
- Keeping Greer occupied in phases where the rest of the group is not on him (usually only the Protoling phase).
- Providing backup projectile reflection.
General Information for all Phases
- Make sure you are dodging or jumping the shockwave component of Greer’s Slams.
- Sidestep all arrows. Try to provide
Stability for them if you can spare it.
- When your bubble player calls for backup (usually by saying “Bubble Down”), you should pick a side of the boss (usually by calling “Double”/”Single”) and place your projectile blocks when you see Empowering Orbs come from your direction.
- Greer aggros on the closest player in a 120% cone in front of him. When tanking, try to always stay in melee range within this cone.
Phase 1
- Start on Reeg and DPS him while playing Greens.
- Block the first [Empowering Orb] from Reeg using
Corrosive Poison Cloud.
- When Greer lumbers over, move between him and Reeg to cleave them together.
- Wait for Greer’s Breath Attack, baiting it outwards. If Reeg is dead, dodge through Greer and position inwards, otherwise continue cleaving him.
- Play the rest of the phase positioned towards the center of the arena.
First Split Phase
- If your
Chronomancers are not doing it, it’s your responsibility to aggro Gree on
and pull it towards the group on
.
- If you are not aggroing Gree, cross the arena to Reeg on
and start damaging him.
- Once Reeg disappears or is close to 50%, move to Gree. Stack on the outside of Gree so that Ereg walks to you.
- Cleave the two adds together. When Ereg uses its Breath Attack, dodge through it and continue cleaving.
Phase 2
- As soon as Gree is dead, walk back to the boss.
- Move to Reeg and kill him while playing Greens. Players targeted by greens should split to the left and right between the boss and the add, as shown in the image.
- Wait for Greer’s Breath Attack, baiting it outwards. If Reeg is dead, dodge through Greer and position inwards, otherwise continue cleaving him.
- Play the rest of the phase positioned towards the center of the arena.
Second Split Phase
Phase 3
- You will have to play triple Greens. If you get one of these, stack with your green buddies together off the main group, then try to dodge the greens together as shown here. If you go downstate, wait for your teammates to rez you.
- Play the beginning of the phase positioned towards the center of the arena.
- After CC, your squad should move through Greer towards the outside of the arena.
- On the first Swipe, Slam or Breath Attack, the rest of the squad will dodge through Greer so that only you remain in front of him.
- Play the rest of the phase tanking Greer towards the outside of the arena while your squad is on the inside.
Protoling Phase
- Stay with Greer. Ask your squad to aggro and pull away any [Protolings] that come to you.
- Stand close to Greer and sidestep Swipes and Cage of Decay. Save your dodges for Slams, making sure to jump the wave.
- Use
Corrosive Poison Cloud if you get too many projectiles on yourself.
- If a Protoling spawns close and aggros on you, you may need to come back to the squad earlier to survive. In this case, try to bait out Greer’s Jump.
- When the last Protoling is close to dying, your commander will have the squad move back to Greer. Prestack conditions on Greer to improve your ramp-up.
- If you are healthy and confident, try to continue facing Greer away from the group until he is dead.
DPS Guide
Your responsibilities consist in:
- Doing as much damage as you can to Greer.
- Trying to stay alive and not fail mechanics while remaining on the stack.
General Information for all Phases
- Make sure you are dodging or jumping the shockwave component of Greer’s Slams.
- Sidestep all arrows. Try to provide
Stability for them if you can spare it.
- Try to check that you have
Stability before tanking a mechanic.
Phase 1
- Start on Reeg and DPS him while playing Greens.
- When Greer lumbers over, move between him and Reeg to cleave them together.
- Wait for Greer’s Breath Attack, baiting it outwards. If Reeg is dead, dodge through Greer and position inwards, otherwise continue cleaving him.
- Play the rest of the phase positioned towards the center of the arena.
First Split Phase
- Cross the arena to Reeg on
and start damaging him.
- Once Reeg disappears or is close to 50%, move to Gree. Stack on the outside of Gree so that Ereg walks to you.
- Cleave the two adds together. When Ereg uses its Breath Attack, dodge through it and continue cleaving.
Phase 2
- Move to Reeg and kill him while playing Greens. Players targeted by greens should split to the left and right between the boss and the add, as shown in the image.
- Wait for Greer’s Breath Attack, baiting it outwards. If Reeg is dead, dodge through Greer and position inwards, otherwise continue cleaving Reeg.
- Play the rest of the phase positioned towards the center of the arena.
Second Split Phase
Phase 3
- You will have to play triple Greens. If you get one of these, stack with your green buddies together off the main group, then try to dodge the greens together as shown here. If you go downstate, wait for your teammates to rez you.
- Play the beginning of the phase positioned towards the center of the arena.
- During CC, your squad should move through Greer towards the outside of the arena.
- On the first Swipe, Slam or Breath Attack after CC, dodge through Greer so that only the tank remains in front of him.
- Play the rest of the phase positioned towards the center of the arena.
Protoling Phase
- Follow your commander to the furthest Protoling.
- Shatter any clones and recall any pets so that Protolings aggro correctly onto you.
- Try to stay on tag while sidestepping Swipes and moving out of Slams.
- You will have to play triple Greens. If you get one of these, stack with your green buddies together off the main group, then try to dodge the greens together as shown here. If you go downstate, wait for your teammates to rez you.
- When the last Protoling is close to dying, your commander will have you move back to Greer. Prestack conditions on Greer to improve your damage.
- Greer will have lots of
Empowered in the final 10%: make sure you are sidestepping Swipes.