Return to Home Return to Overview Mechanical Reference Strategy Guide
Fast Decima Guides
This page contains some simple guides for several roles in the Godsquall Decima encounter. If you want something more in-depth, please read the full Strategy Guide.
All markers referenced in this guide can be set up with the Commander Markers module for Blish HUD, using the marker pack provided below.
Click to view markers
 Paste the following code into Commander Markers to use this marker pack:
eyJlbmFibGVkIjp0cnVlLCJuYW1lIjoiRGVjaW1hIENNIFN0cmF0ZWd5IiwiZGVzY3JpcHRpb24iOiJEZWNpbWEgQ00gc3RyYXRlZ3kgbWFya2VycyBwYWNrIGJ5IE1pa2UgW0NSU10iLCJtYXBJZCI6MTU2NCwidHJpZ2dlciI6eyJ4IjotMjc2LjU1NjEyMiwieSI6MjY1Ljc3OTU3MiwieiI6MTM4LjUxNjc2OX0sIm1hcmtlcnMiOlt7ImkiOjEsImQiOiJTb3V0aCBtYXJrZXIiLCJ4IjotMjU2Ljk5MDEsInkiOjMxNi40OTY0NiwieiI6MTM4LjUyMjM1NH0seyJpIjoyLCJkIjoiV2VzdCBtYXJrZXIiLCJ4IjotMjc3LjA4MzI4MiwieSI6MzM5LjE4OTk0MSwieiI6MTM4LjUyMjM1NH0seyJpIjozLCJkIjoiTm9ydGggbWFya2VyIiwieCI6LTI0OC41NDI3NCwieSI6MzQ3LjI0NDE0MSwieiI6MTM4LjUyMjM1NH0seyJpIjo3LCJkIjoiUm9sbCBvdXQgc3BvdCEgKHN0YXJ0aW5nIGxvY2F0aW9uKSIsIngiOi0yODIuNDU2MiwieSI6MjczLjQ2MDksInoiOjEzOC41MTY1fV19
What are you playing?
Melee Boon/DPS Guide
Your responsibilities (excluding basic damage and support as required by your role) consist in:
- Being close to the boss so that you are targeted by Spreads.
- Intercepting Greens on their way to the boss.
General Information for all Phases
- Never linger inside the boss’ hitbox: Seismic Crash or Earthrend will kill you.
- Never move out of melee range from the boss. If you are hit by an Arrow you cannot collect Greens. You should always stand on the edge of the boss’ hitbox.
- When you get Spreads, dodge them inwards or sideways at the last second. You can stack spreads with other players, and dodge all of them at once.
- When you see Greens, intercept them by standing on them. Make sure you do not move from the boss to do this: only intercept them when they are in melee range, while remaining on the edge of the boss’s hitbox.
Phase 1
100% - 80%
- Enter the arena using
Roll Out or
Leap.
- Stack with your group on the side of the
marker and attack the boss.
First Split Phase
- Once Decima becomes
Invulnerable, turn around 180° and walk into your cage.
- Start attacking the add, taking care not to CC it.
- Make sure you are standing on the inside of the add, towards Decima, to bait Spreads. When you get your spread, dodge it towards the add.
- Once the add is dead, your healer should provide you with a portal. Take it to get back to the boss.
80% - 70%
- Play this phase the same as 100%-80% in your new position.
- The first collection can be tricky: use your movement skills to get to Greens in time if necessary.
70% Transition
- Save your DPS and CC skills once Decima hits 70%.
- Follow the boss when it jumps. Dodge any Spreads.
- Use all your CC on the boss.
- Use your personal healing skills to offset the big damage attack when it starts.
Phase 2
70% - 50%
- Start on the
marker. Repeat as in phase 1.
- Rotate towards
or
to collect Greens when they spawn.
- Run out to your cage towards
when the boss phases.
Second Split Phase
- Play it similarly to the first one.
- It is extremely important to not CC the add in this phase.
50% - 40%
- Played identically to 80% - 70%.
40% Transition
- Save your DPS and CC skills once Decima hits 40%.
- Follow the boss when it jumps. Dodge any Spreads.
- Use all your CC on the boss.
- Use your personal healing skills to offset the big damage attack when it starts.
Phase 3
40% - 10%
- Follow the boss whenever it jumps.
- Follow your commander’s calls for which side of the boss to stack on.
- The Green Arrow is the most important mechanic: make sure you are always in it when it spawns.
- If you get Spreads during the Green Arrow, dodge them while staying inside the arrow.
- You may have to split the group to cover Greens coming from multiple directions.
Phase 4
Melee Healer Guide
Your responsibilities (excluding basic healing and support as required by your role) consist in:
- Being close to the boss so that you are targeted by Spreads.
- Intercepting Greens on their way to the boss.
- Providing
Stability and CC at key moments.
- Providing a portal in the split phases to simplify collecting Greens.
General Information for all Phases
- Never linger inside the boss’ hitbox: Seismic Crash or Earthrend will kill you.
- Never move out of melee range from the boss. If you are hit by an Arrow you cannot collect Greens. You should always stand on the edge of the boss’ hitbox.
- When you get Spreads, dodge them inwards or sideways at the last second. You can stack spreads with other players, and dodge all of them at once.
- When you see Greens, intercept them by standing on them. Make sure you do not move from the boss to do this: only intercept them when they are in melee range, while remaining on the edge of the boss’s hitbox.
- After the first and every other set of Arrows, you will have to provide
Stability for Seismic Crash.
Phase 1
100% - 80%
First Split Phase
- Once Decima becomes
Invulnerable, move to her new position and prepare your portal inside the cage, to the right of the boss.
- Use your mobility skills to get to your subgroup’s add, taking care not to CC it.
- Make sure you are standing on the inside of the add, towards Decima, to bait Spreads. When you get your spread, dodge it outwards, towards the add.
- Once the add is dead, provide
Stability, then open your portal back to the boss.
80% - 70%
- Play this phase the same as 100%-80% in your new position.
- The first collection can be tricky: use your movement skills to get to Greens in time if necessary.
70% Transition
Phase 2
70% - 50%
- Start on the
marker. Repeat as in phase 1.
- Rotate towards
or
to collect Greens when they spawn.
Second Split Phase
- Once Decima becomes
Invulnerable, walk towards her new position and prepare your portal inside the cage, to the right of the boss.
- Use your mobility skills to get to your subgroup’s add.
- DO NOT CC THE ADD.
- If the add gets CC’d, stand furthest from it inside the cage to bait out Fulminate. Make sure to point it away from the other subgroup.
- Once the add is dead, provide
Stability, then open your portal back to the boss.
50% - 40%
- Played identically to 80% - 70%
40% Transition
Phase 3
40% - 10%
- Follow the boss whenever it jumps. Provide
Stability for each jump.
- Follow your commander’s calls for which side of the boss to stack on.
- The Green Arrow is the most important mechanic: make sure you are always in it.
- If you get Spreads during the Green Arrow, make sure to dodge them while staying inside the arrow.
- Make sure to heal your subgroup members that are collecting Greens off-stack.
Phase 4
Ranged Boon/DPS Guide
Your responsibilities (excluding basic damage and support as required by your role) consist in:
- Being far from the boss so that you are targeted by Arrows.
- Pointing Arrows away from Conduits and other players.
General Information for all Phases
- During damage phases, try to always stay on the limit of the Thrumming Presence AoE.
- When you get an Arrow, spread out so you are not overlapping or pointing it at a Conduit. Being hit by multiple Arrows in succession will give you
Exposed and probably down you.
- Make sure you are closer to the boss than your kiter. This prevents you from baiting the Red Arrow.
- Avoid standing in Greens: they will quickly kill you.
Phase 1
100% - 80%
- Enter the arena using
Roll Out or
Leap.
- Stack with your group on the side of the
marker and attack the boss.
- During the first pizza attack, move to
and be at range for the first set of Arrows.
- Stay around
for the rest of the phase.
First Split Phase
- Once Decima becomes
Invulnerable, turn around 180° and walk into your cage.
- Start attacking the add, taking care not to CC it.
- Make sure you are standing on the outside of the add, towards Decima, to bait Arrows.
- Once the add is dead, your healer should provide you with a portal. Take it to get back to the boss.
80% - 70%
- Play this phase the same as 100%-80% in your new position.
70% Transition
- Save your DPS and CC skills once Decima hits 70%.
- Follow the boss when it jumps. Dodge any Spreads.
- Use all your CC on the boss.
- Use your personal healing skill to offset the big damage attack when it starts.
Phase 2
70% - 50%
- Start on the
marker.
- Play as in phase 1, but now always bait arrows around
.
- Avoid standing in any Greens that spawn behind you.
- Run out to your cage towards
when the boss phases.
Second Split Phase
- Play it similarly to the first one.
- It is extremely important to not CC the add in this phase.
50% - 40%
- Played identically to 80% - 70%
40% Transition
- Save your DPS and CC skills once Decima hits 40%.
- Follow the boss when it jumps. Dodge any Spreads.
- Use all your CC on the boss.
- Use your personal healing skill to offset the big damage attack when it starts.
Phase 3
40% - 10%
- Follow the boss whenever it jumps.
- Bait your Arrows between the two cages, just inside Thrumming Presence.
Phase 4
Kiter Guide
As the kiter, you control the flow and direction of the encounter. Your responsibilities (excluding basic healing and support as required by your role) consist in:
- Being far from the boss so that you are targeted by Arrows.
- Pointing Arrows away from Conduits and other players.
- Baiting the Red Arrow by being the furthest player from the boss.
- Controlling which conduits are charged by Thunder.
- Controlling the spawn position of the Green Arrow.
- Providing
Stability and CC at key moments.
General Information for all Phases
- Try to always stay just outside the Thrumming Presence AoE (except for the start of phase 1).
- Make sure your subgroup is full health and has
Protection before each set of arrows.
- When you get an Arrow, spread out so you are not overlapping or pointing it at a Conduit. Being hit by multiple Arrows in succession will give you
Exposed.
- After every odd set of Arrows, you will have to provide
Stability for Seismic Crash.
- Make sure you are always the furthest person from the boss for every even set of arrows, in order to bait the Red Arrow.
- When you get the Red Arrow, use a mobility skill to move behind a Conduit and block the arrow. Once you are behind the conduit, do not move until the arrow fires.
- Don’t stand in Greens unless you’re actively outhealing the damage.
Phase 1
100% - 80%
- Enter the arena using
Roll Out or
Leap.
- Stack with your group on the side of the
marker and attack the boss.
- During the pizza attack, move out towards
and be at range for the first set of Arrows.
- Move towards your subgroup at
once you get your arrow.
- Play the second set of arrows (which includes a Red Arrow) on
.
- During the next pizza, move to
to charge the final set of conduits.
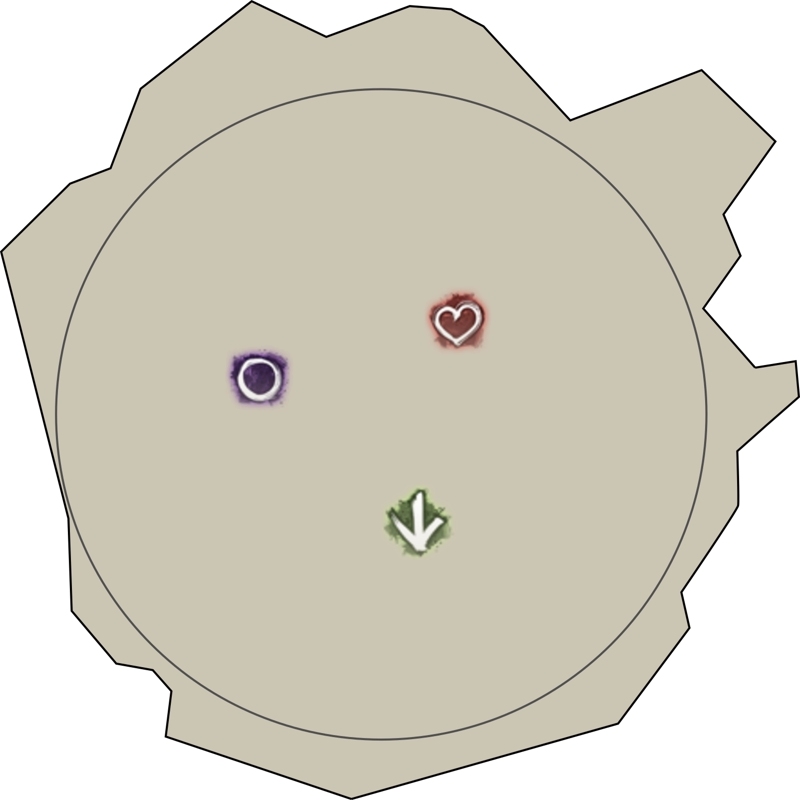
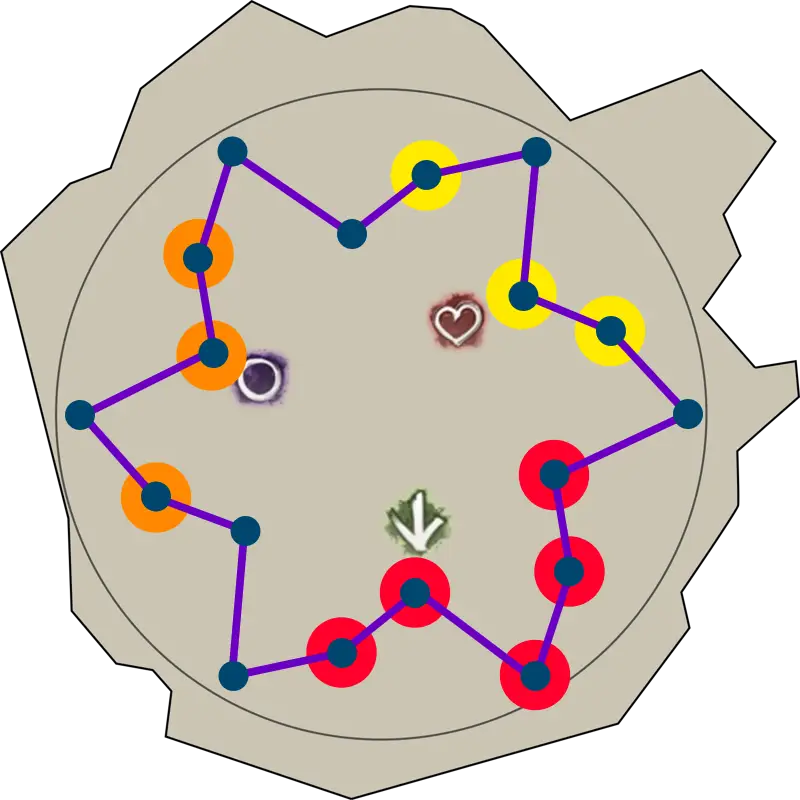
When played correctly, you should have charged just one of the outer conduits of Decima’s formation. In the image below, the red conduits will have been charged during the first set of arrows, the orange can be charged during the second, and the yellow in the third.
First Split Phase
- Once Decima becomes
Invulnerable, move to her new position and prepare your portal outside the cage to the left of the boss.
- Use your mobility skills to get to the add, taking care not to CC it.
- Make sure you are the furthest person from the boss. If you get a Red Arrow, hide behind a conduit.
- Once the add is dead, provide
Stability, then open your portal back to the boss.
80% - 70%
- Play this phase the same as 100%-80% in your new position.
70% Transition
Phase 2
70% - 50%
- Start on the
marker.
- Play as in phase 1, but now always bait arrows and charge conduits around
.
- Avoid standing in any Greens that spawn behind you.
Second Split Phase
- Once Decima becomes
Invulnerable, move to her new position and prepare your portal outside the cage to the left of the boss.
- Use your mobility skills to get to the add, DO NOT CC THE ADD.
- Make sure you are the furthest person from the boss. If you get a Red Arrow, hide behind a conduit.
- If the add gets CC’d, stand furthest from it inside the cage to bait out Fulminate. Make sure to point it away from the other subgroup.
- Once the add is dead, provide
Stability, then open your portal back to the boss.
50% - 40%
- Played identically to 80% - 70%.
40% Transition
Phase 3
40% - 10%
- Follow the boss whenever it jumps. Provide
Stability for each jump.
- Stack between the two cages to bait the Arrows. Be close to the cage on the opposite side from the melee group to bait the Green Arrow on top of them.
- For the second set of arrows following, be the furthest player from the boss in order to bait the Red Arrow.
- When you get the Red Arrow, move into the position shown by the image in order to survive and not charge any conduits.
- Green and red arrow baits alternate for the rest of the phase.
![]()